Thursday, April 29, 2010
Wednesday, April 28, 2010
Presentation
The last couple of days has been crazy. We have been frantically working to get the project finish. right now, t minus 1.5 hours, I'm waiting on UPS to deliver the last set of servos so we can finish wall. So While I wait here are some pictures of our final assembly

Alex cutting the frame

Derek putting on the hardboard

The basic Modules done. It come apart into 4 pieces so we move it to the jury room

Derek working on the screen

The wall moved to the jury room

The mess of wiring

The LED Bar thats inside of each panel, 16 3 Watt LEDs

A closer look at the receiver box- two arduino communicating over serial

A look at the servo inside the wall.
Ah, the UPS guy! Back to school with the servos!

Alex cutting the frame

Derek putting on the hardboard

The basic Modules done. It come apart into 4 pieces so we move it to the jury room

Derek working on the screen

The wall moved to the jury room

The mess of wiring

The LED Bar thats inside of each panel, 16 3 Watt LEDs
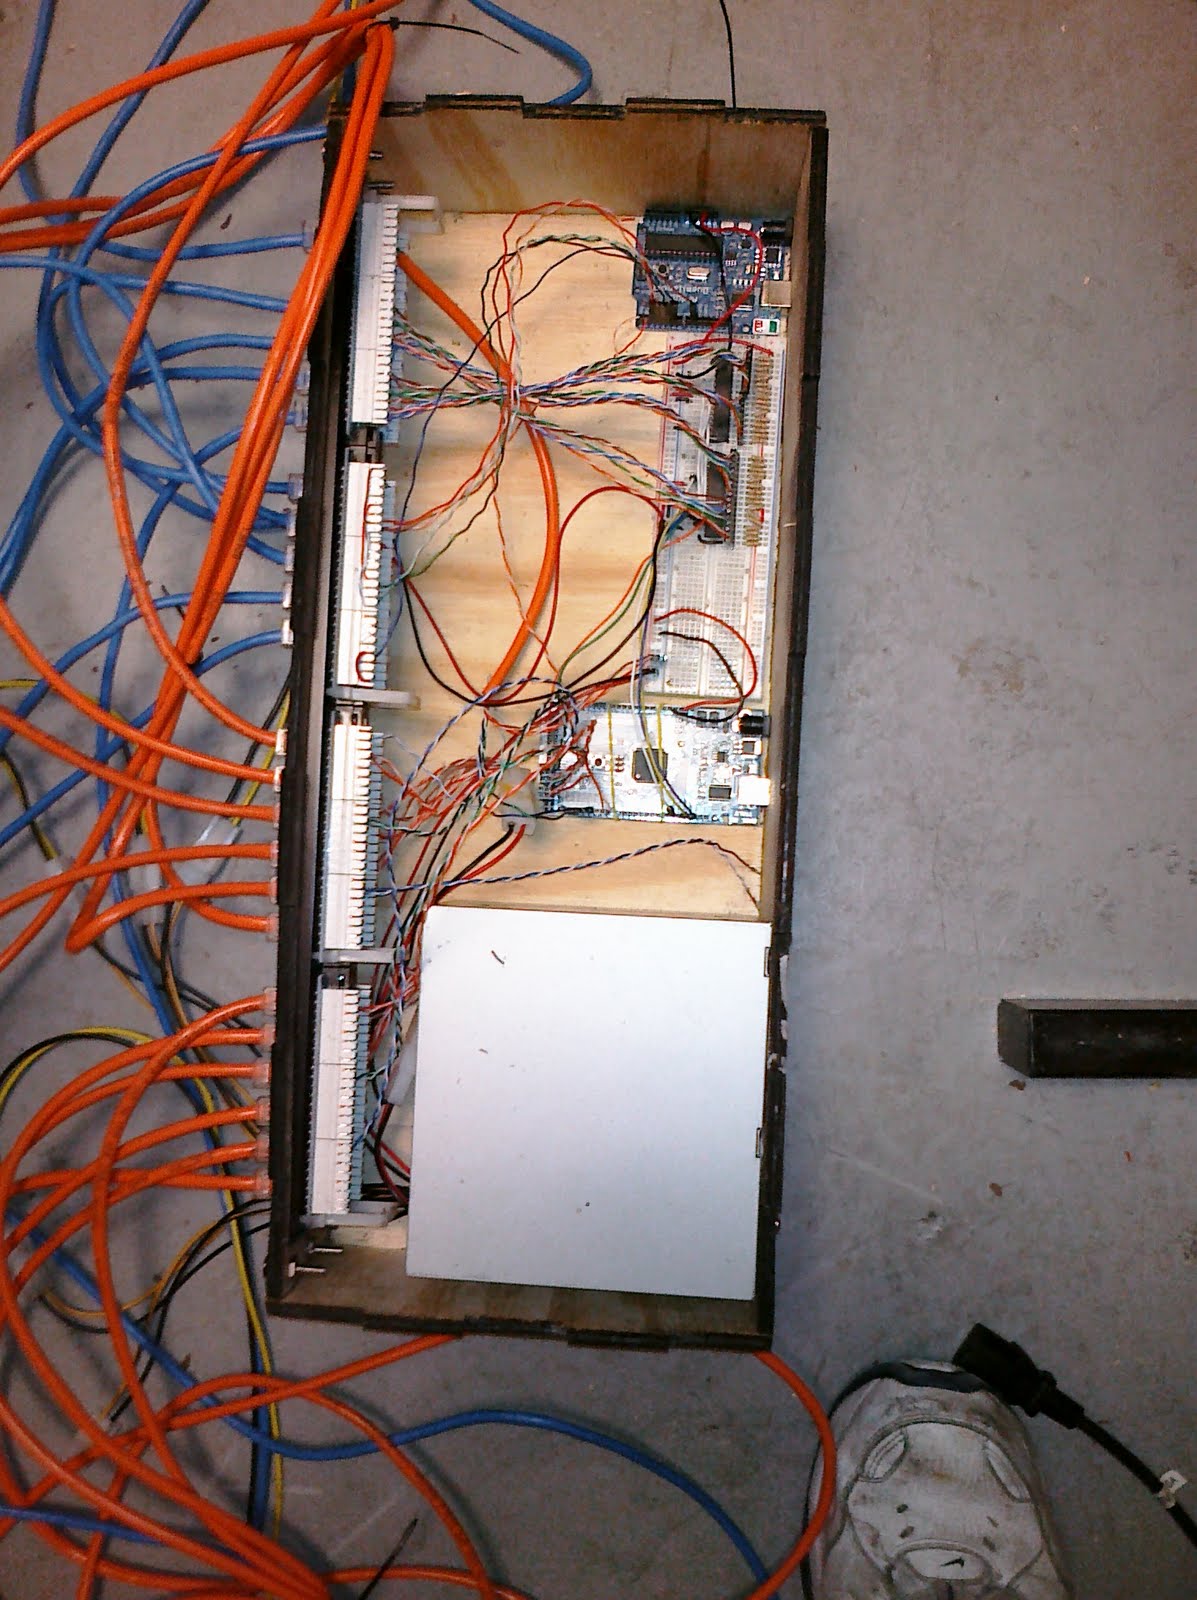
A closer look at the receiver box- two arduino communicating over serial

A look at the servo inside the wall.
Ah, the UPS guy! Back to school with the servos!
Tuesday, April 27, 2010
Progress
So the past 2 days, Derek and I have been working on constructing the skin and figuring out the last few details while Matt has been breakingdown the LED panels and debugging. We have a majority of the skins constructed with one still to mount. Panels will be mounted inside the plastic peaces that will block and deflect the light when the skin flexes.
because of the way the wall is constructed, we may decide to have several spots in which the skin flexes in each bay giving it a more unpredictable pattern. 


Monday, April 26, 2010
Thoughts on Humanistic Propeties
In life designers have a tendancy to give their projects properties that evoke some type of anthropomorphic property. Something that feels like..., something that acts like...., or something that sounds such as.... All relating back towards a "cultural or humanistic" relationship.
The wall is to take on this idea in an emotional way. Through the use of technology we are able to bring "LIFE" to our project... artificial life.
When first encountering the wall, the onlooker experiences a light play that seems almost whimiscal in the way the colors intermingle and "dance" from panel to panel. One is to feel that the wall takes on a childish, playful excited emotion that congures up the thought of a dance, or PLAY* in it sense. The wall is enjoying its alone time in the way a child would allow there imagination to run wild.
However, once prevoked the wall takes apon a different character, a more agressive one. One that seems almost defensive yet excepting in its own way. The person experienceing the project is encountered by a change of light and the way that light reacts to its adjacent partner. The light speeds, becomes brighter, and even "jumps" in a random or more unpredictable way.
The wall not only starts to react one dimensionaly, but also two dimensionally as well. The wall flexs and pushes towards the approach and has a reaching effect to its encombant. This signifys its recognition of an individual and tells the individual about the acknowledgement of the persons presence. The closer one gets the more "aggressive" the reach as well as the more intense the light play.
When left alone, the wall acknowledges the retreat and reacts accordingly alowing its self to deflate and return to its capricious activities.
Saturday, April 24, 2010
Lazer cutting module
So, today I cut a majority of the modules made of plastic and chipboard. The plastic and chip interlock without any glue. the plastic is attached to a wire frame which will flex and separate the chip allowing light to penetrate and filter though the screen. Doll and Derek did some of the cutting before I got to school. Doll also worked on cutting down the bar of LED's to fit in the bays of the frame we built.
The pictures below are from today's progress and some details of the module .
.
 .
.


Wednesday, April 21, 2010
Frame of 8x8 wall
Today, I helped finish the Assembly and clad the 2 x 8 bays. So far for our final mock up, I have helped Doll with cutting up a good portion of the wiring (while watching and learning how the LED's work), worked with Doll on cutting and assembling all the bays/frames (cutting the different dimensions of lumber, checking measurements, making sure the frames are square, adding cross bracing, etc.), and worked with both of my teammates in cladding the frame (I helped with the cutting of the hardboard while they did the cladding). I also had my design trip this past week which somewhat limited me on what I could help with, however, I did do some sketches during that trip, which I will post up before the weekend when they are finished. 

Our team also talked about a new proposal for the skin. We primarily descussed how these wires will 'flex', and how light will be revealed in relation to the plastic/light defuser. In this scheme, we settled on the fact that the skin will serve primarily as a diffuser, and not so much as an element that reveals light. Also, by keeping one of the wires fixed, it may help the servos flex the wire much easier as opposed to bending both sides of the wire. And lastly, the element that will flex the wires will likely be either one or a series of rounded peaces of wood that will bend and push out the skin making it flex and diffuse light in different ways.
Monday, April 19, 2010
new skin

Volumes separating and allowing light to penetrate.

new skin study is almost like reptile skin in a way. Composed so that the light might find its way through the acrylic and passed the skin.
Skin


One of the "SKIN STUDIES" we performed as a group was to use the laser cutter to design a pattern out of cad and implement it onto acrylic so that it had the flexibility that we were looking for. The flexible acrylic is actually used for covering a large light fixture in and commercial or educational facility. This material has an ability to flex appropriately as well as disperse the L.E.D.'s in a way that is attractive to the eye.
The skin study shown up top was composed of a teeth like pattern that when UN activated it sat flat in a zig-zag like pattern, but when activated, the skin would act like a "hedge hog" and enunciate its jagged position, so it almost reacts like a defense mechanism. The idea was so that when the wall Flex's and reacts, The skin would bestow the same type of properties that might be shown as when a human reacts and protects them self.
The design is felt to be a "life" of its own, freely "dancing" amongst it environment not intruding upon another, but once provoked, the skin is to become conscious of it's surroundings and act accordingly in a defensive manor as one might when approached by a hostile situation.
Construction


The frame system has begun.
The goal is to frame the system with wood, then apply a layer of hard board over it for cladding, we just need to figure out how the actual skin and the frame or body is going to connect and work together.
Wednesday, April 14, 2010
Images of frame construction
Today I worked with Mat to make the frame of our wall. We are making 2 foot bays so we can transport the wall where we need it. We will clad these frames with press board. Most of the frame is complete. This upcoming week, I will work on a final 3d model for the project to evolve the project and to generate images. I will also be looking at precidents Mark mentioned to me today the help finalize a few issues and get ready for produciton.
I think it is very important that we not only take into account the dimentions of our 2x8 frame, but also the bed size of the lazer cutter. This will help maximize our use of material.


light studies
 This past week, Doll and I discussed some ideas for the skin as well as the Assembly of the frame. I made 2 sketch models of the skin, one of which I am showing in the first 2 images of this post. We also manipulated plastic and previous sketch models to come up with ideas and to work with what we have now.


Monday, April 12, 2010
Control Box 2.0
The chipboard and hotglue box didn't last very long... Back to the laser cutter!
This time I used a piece of 1/4" plywood.

The laser was out of focus on the first pass so it gave the whole thing a good scorching. The interior is laid out exactly the same so it was a snap to move everything over

The blue cable connects to another arduino over serial that is connected to led's an sensors

It's always cool to what left over after laser cutting

Control Box
To test different background patterns for the wall, I wanted to build a sort of control box. I bought a variety of potentiometers- slides and knobs a while back and I can put them to use. so I designed a box and got it laser cut.

Amazingly everything fit the first time.

Inside there is breadboard to hold all of the fixed items as well as arduino.
I wrote a test program for each of the different elements-lcd, knobs, slides and buttons.
Button test
Slider Test
Here is the code to test the sliders

Amazingly everything fit the first time.

Inside there is breadboard to hold all of the fixed items as well as arduino.
I wrote a test program for each of the different elements-lcd, knobs, slides and buttons.
Button test
Slider Test
Here is the code to test the sliders
#include <LiquidCrystal.h>


const byte redSliderPin   = 0;

const byte greenSliderPin = 1;

const byte blueSliderPin  = 2;

const byte whiteSliderPin = 3;


// Init our Input Vars

byte redSlider;

byte greenSlider;

byte blueSlider;

byte whiteSlider;


// initialize the library with the numbers of the interface pins]

LiquidCrystal lcd(2, 3, 4, 5, 6, 7);


void setup() {

// set up the LCD's number of rows and columns:

lcd.begin(16, 2);

}


void loop() {


redSlider   = analogRead(redSliderPin)/4;

greenSlider = analogRead(greenSliderPin)/4;

blueSlider  = analogRead(blueSliderPin)/4;

whiteSlider = analogRead(whiteSliderPin)/4;


// set the cursor to column 0, line 1

// (note: line 1 is the second row, since counting begins with 0):

lcd.setCursor(0, 0);

lcd.print("R: ");

lcd.print(redSlider,DEC);

lcd.print('  ',BYTE);


lcd.setCursor(8, 0);

lcd.print("G: ");

lcd.print(greenSlider,DEC);

lcd.print('  ',BYTE);


lcd.setCursor(0, 1);

lcd.print("B: ");

lcd.print(blueSlider,DEC);

lcd.print('  ',BYTE);


lcd.setCursor(8, 1);

lcd.print("W: ");

lcd.print(whiteSlider,DEC);

lcd.print('  ',BYTE);

}
Subscribe to:
Posts (Atom)