Sunday, May 30, 2010
Thursday, May 20, 2010


Tuesday, May 11, 2010
Wiring Diagram
This is rough diagram of how the the electronics behind the wall are wired together.

Click for Full Size

Click for Full Size
Monday, May 10, 2010
Wow! Have you work with electronics much before?
This is probably the most common question I've gotten so far.
The short answer is no.
Before this class, I'd never heard of Arduino and microcontrollers before. I had always though such things were too complicated for a non computer engineer. I was very wrong. I've had a lot of experience programing websites in PHP over the years so I knew how to code so I wasn't completely starting from scratch. Mark (our professor) loaned me an Arduino to play with during the first week of the class and things just clicked. My high school physics class rushed back to me (V=I*R, W=V*A) and I read a bunch of the tutorials on the Arduino website. I quickly became addicted. I would find myself reading about arduino's instead of working on design studio. Soon I was spending my paycheck over on sites like Sparkfun. I can say I learned more during this class than almost any other I've taken before and it definitely changed what my thesis is going to be this fall.
I love that I majored in architecture because it touches on so many different subjects and allows a lot of freedom to explore things like Art and graphics, 3d modeling/rendering/animation to electronics and engineering. I can't wait to further explorer new ways to integrate electronics in to Architecture and the building we inhabit.
Presentation Code
One Arduino is in the background remote. It generates the base color/animation for the wall. The 'A' buttons allow you to pick a background program.
Some of the current ones are:
-Solid color: the sliders determine the color;
-Rainbow: one of the knob determines the speed and direction.
-Fade: loops through the leds fading each one
The 'B' buttons set the interaction program.
Currently you can choose:
-Light only: the wall only lights up where people are,
-Glow white: the white LEDs glow where people are
-Shift Hue: shifts the hue of the LEDs where people are
The remote sends the 'B' value to the receiver box along with the value of the first knob.
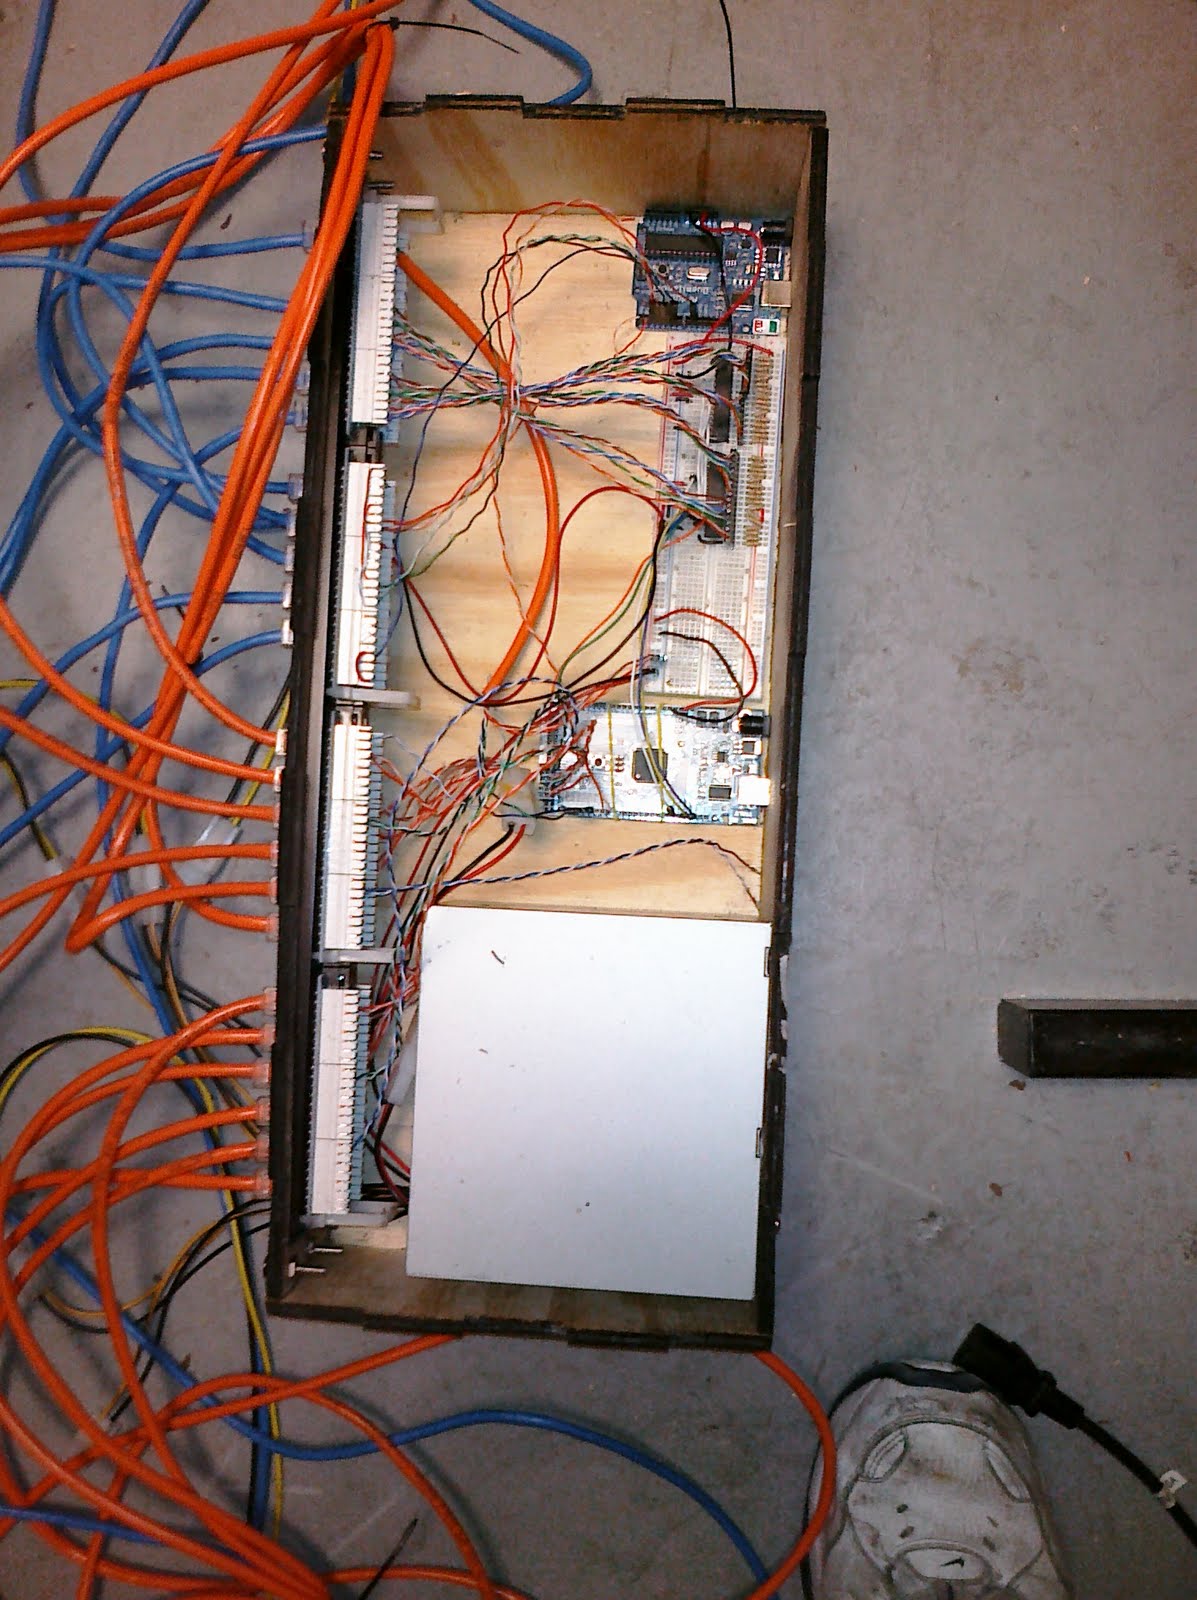
The other 2 arduino's are in the receiver box along with an ATX power supply, a breadboard with 2 tlc5940's and a cat5 patch panel to make for easy connections to the led drivers, servos and proximity sensors.
This is the code that we ran on the arduinos during our presentation.
There are three parts:
1) The arduino that generates the background color/animation.
2) The arduino that reads the distance sensors
3) The arduino that receives serial data from the other 2 arduinos and generates a modifier based on the sensors and applies it to the background color and servos.
Download the code digitalwall-0.1.zip
Note: I did not include the TLC5940 Library, you will need to download it from the Arduino Playground.
Some areas that need improvement:
-Hue shifting code needs to be optimized or moved to another arduino. Currently the receiver can't process the code fast enough to work at 30fps.
-The proximity sensors output a digital pwm signal that the arduino reads with a pulseIn function, but it only reads one at a time, a process that can take up to 60mills each. we could get more data if we write our own pulseIn command, probably tied to a timer so it can poll multiple sensors at once.
-The knobs on the background box don't do much at the moment, the color programs should use them to modify speed, intensity, randomness etc.
-The fading code was adapted from the tlc5940 library. There needs to be line in the code to clear all fades when you leave a program that set a bunch of fades.
Future Plans....
-Create a website where people can change the walls colors with their smart phone
-Make it visualize music
Some of the current ones are:
-Solid color: the sliders determine the color;
-Rainbow: one of the knob determines the speed and direction.
-Fade: loops through the leds fading each one
The 'B' buttons set the interaction program.
Currently you can choose:
-Light only: the wall only lights up where people are,
-Glow white: the white LEDs glow where people are
-Shift Hue: shifts the hue of the LEDs where people are
The remote sends the 'B' value to the receiver box along with the value of the first knob.
The other 2 arduino's are in the receiver box along with an ATX power supply, a breadboard with 2 tlc5940's and a cat5 patch panel to make for easy connections to the led drivers, servos and proximity sensors.
This is the code that we ran on the arduinos during our presentation.
There are three parts:
1) The arduino that generates the background color/animation.
2) The arduino that reads the distance sensors
3) The arduino that receives serial data from the other 2 arduinos and generates a modifier based on the sensors and applies it to the background color and servos.
Download the code digitalwall-0.1.zip
Note: I did not include the TLC5940 Library, you will need to download it from the Arduino Playground.
Some areas that need improvement:
-Hue shifting code needs to be optimized or moved to another arduino. Currently the receiver can't process the code fast enough to work at 30fps.
-The proximity sensors output a digital pwm signal that the arduino reads with a pulseIn function, but it only reads one at a time, a process that can take up to 60mills each. we could get more data if we write our own pulseIn command, probably tied to a timer so it can poll multiple sensors at once.
-The knobs on the background box don't do much at the moment, the color programs should use them to modify speed, intensity, randomness etc.
-The fading code was adapted from the tlc5940 library. There needs to be line in the code to clear all fades when you leave a program that set a bunch of fades.
Future Plans....
-Create a website where people can change the walls colors with their smart phone
-Make it visualize music
Sunday, May 9, 2010


Saturday, May 8, 2010
Reading Material
We found several good books at the library that we thought were useful to read and inspired different parts of our project.


Thursday, April 29, 2010
Wednesday, April 28, 2010
Presentation
The last couple of days has been crazy. We have been frantically working to get the project finish. right now, t minus 1.5 hours, I'm waiting on UPS to deliver the last set of servos so we can finish wall. So While I wait here are some pictures of our final assembly

Alex cutting the frame

Derek putting on the hardboard

The basic Modules done. It come apart into 4 pieces so we move it to the jury room

Derek working on the screen

The wall moved to the jury room

The mess of wiring

The LED Bar thats inside of each panel, 16 3 Watt LEDs

A closer look at the receiver box- two arduino communicating over serial

A look at the servo inside the wall.
Ah, the UPS guy! Back to school with the servos!

Alex cutting the frame

Derek putting on the hardboard

The basic Modules done. It come apart into 4 pieces so we move it to the jury room

Derek working on the screen

The wall moved to the jury room

The mess of wiring

The LED Bar thats inside of each panel, 16 3 Watt LEDs
A closer look at the receiver box- two arduino communicating over serial

A look at the servo inside the wall.
Ah, the UPS guy! Back to school with the servos!
Tuesday, April 27, 2010
Progress
So the past 2 days, Derek and I have been working on constructing the skin and figuring out the last few details while Matt has been breakingdown the LED panels and debugging. We have a majority of the skins constructed with one still to mount. Panels will be mounted inside the plastic peaces that will block and deflect the light when the skin flexes.
because of the way the wall is constructed, we may decide to have several spots in which the skin flexes in each bay giving it a more unpredictable pattern. 


Monday, April 26, 2010
Thoughts on Humanistic Propeties
In life designers have a tendancy to give their projects properties that evoke some type of anthropomorphic property. Something that feels like..., something that acts like...., or something that sounds such as.... All relating back towards a "cultural or humanistic" relationship.
The wall is to take on this idea in an emotional way. Through the use of technology we are able to bring "LIFE" to our project... artificial life.
When first encountering the wall, the onlooker experiences a light play that seems almost whimiscal in the way the colors intermingle and "dance" from panel to panel. One is to feel that the wall takes on a childish, playful excited emotion that congures up the thought of a dance, or PLAY* in it sense. The wall is enjoying its alone time in the way a child would allow there imagination to run wild.
However, once prevoked the wall takes apon a different character, a more agressive one. One that seems almost defensive yet excepting in its own way. The person experienceing the project is encountered by a change of light and the way that light reacts to its adjacent partner. The light speeds, becomes brighter, and even "jumps" in a random or more unpredictable way.
The wall not only starts to react one dimensionaly, but also two dimensionally as well. The wall flexs and pushes towards the approach and has a reaching effect to its encombant. This signifys its recognition of an individual and tells the individual about the acknowledgement of the persons presence. The closer one gets the more "aggressive" the reach as well as the more intense the light play.
When left alone, the wall acknowledges the retreat and reacts accordingly alowing its self to deflate and return to its capricious activities.
Saturday, April 24, 2010
Lazer cutting module
So, today I cut a majority of the modules made of plastic and chipboard. The plastic and chip interlock without any glue. the plastic is attached to a wire frame which will flex and separate the chip allowing light to penetrate and filter though the screen. Doll and Derek did some of the cutting before I got to school. Doll also worked on cutting down the bar of LED's to fit in the bays of the frame we built.
The pictures below are from today's progress and some details of the module .
.
 .
.


Subscribe to:
Posts (Atom)